In the first part of our Articulate Storyline features outline, we went through the first seven Articulate Storyline features we think will save you a TON of time. Now let’s get to the second batch.
Eyedropper
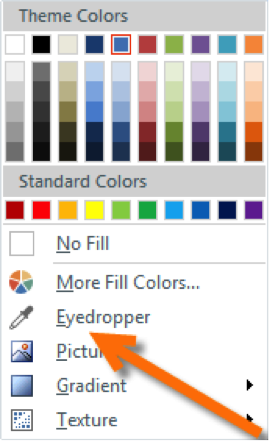
The eyedropper tool has been around in a ton of tools for a very long time, but it doesn’t always seem to be where you need it when you need it. Storyline adds this handy tool just about anywhere you need to select a color.
What does it do? It lets you quickly copy the color from anything visible on your screen and use that as your current color. Want to match something to a color in the photo you just imported? The eyedropper can help you do that in a snap.
Zoom Timeline
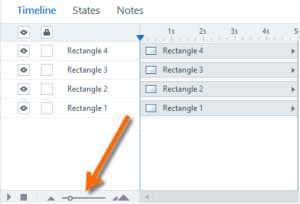
One of the crucial components of Storyline, and other tools like it, is the timeline. This shows what objects are on your slide, and when to they show up or disappear. Anything that requires you to set timings for objects has you interacting with the timeline. Still, some people don’t know that you can zoom in and out, to show more or less of the timeline at once.
I typically have the timeline zoomed way out so I can see as much time at once as possible. However, did you know that zooming in shows finer increments? When you’re zoomed out, the timeline shows increments in quarter-seconds. However, if you zoom in more, it will display eighths of a second. This isn’t always needed, but there are times when adjusting the timing of objects needs this extra accuracy.
Change Picture
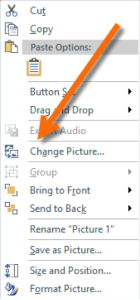
Have you ever imported a picture, done a bunch of stuff to it (settings, adding triggers, etc.) and then realized you need a slightly different picture? If you delete the picture and import a new one you’ll lose all the things you did to set up the first one. However, using a handy little feature called “Change Picture” will replace the old picture with the new one, keeping all the stuff you did originally. Just right-click the picture itself and select Change Picture.
Slide Layer Properties
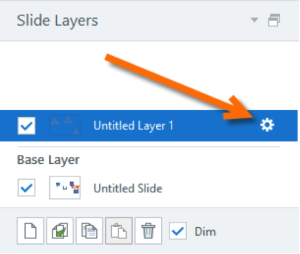
When you open a layer, do you want it to automatically hide other layers, or do you want to be able to see multiple at once? When a user revisits a layer, do you want it to pick up where it left off or start over from the beginning of that layer’s timeline? And do you want there to be a seekbar for each layer, or just for the main base layer? All of this and more can be customized in the Layer Properties window. Just click the little gear to the right of the layer (in the Slide Layer Panel) and you can change these setting for each layer individually.
Set Transparent Color
Have you ever imported a picture and realized you needed to pull out the background? There are lots of tools for doing this, but Storyline has a way to do this in a pinch. In the right scenario, with a couple clicks, you can avoid opening another graphics tool, pulling in the image, removing the background, re-saving the image, and re-importing back into Storyline.
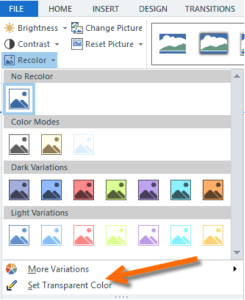
So, how does this work? With the picture selected, under the Format tab, select Recolor>Set Transparent Color. Once you do this, whatever color you select in your photo will become transparent. Please note that this will make every instance of that color in the entire photo become transparent, so if you have patches of that color throughout the photo, you will likely get an unexpected (and undesirable) result. You can also only make a single color transparent. However, if you have a basic image scenario, like an object on a white background, this can be a quick and effective technique.
Show Multiple Layers
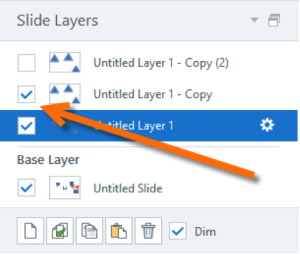
Sometimes managing your slide layers can be a pain. One of the challenges is keeping things lined up where you want them when they’re on different layers. Well, Storyline lets you show or hide multiple layers at a time. By default, when you select a layer, it will only show the objects for that layer. However, selecting the checkboxes to the left of the layers will allow you to see those layers simultaneously. This can be a real time-saver to get things looking the way you want.
Size and Position
While many people seem to know this exists, people still tend not to use it. One of the telltale signs of an amateur course is objects jumping around the screen when they aren’t supposed to.
What do I mean? How many times have you seen a course (maybe even one of your own) with an object on multiple slides, where that object shifts up/down/left/right or gets a little bigger/smaller from one slide to the next? This happens when the object (or slide) gets duplicated, then you decide to change the size or position of the object, and then you try to eyeball the change on the other slides.
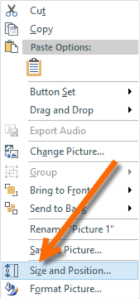
The size and position feature is an easy way to solve this. Right-clicking the object and selecting Size and Position brings up the setting menu. The great thing about using this is that you can leave the window open as you click through each of the objects you want to modify, even if they’re on different slides. No need to close the window after each one (which I see lots of developers still do).
Articulate Storyline Features Make Your Life Easier
That’s it! Nothing truly earth shattering here, but tons of time to be saved using these tips—and time is such a precious resource. If you’re already using all of these features, GREAT! You’re super efficient already. For everyone else, hopefully you’ve picked up a few tips to make your development go a little bit more smoothly.