Sometimes the simple things in life are the best.
While it’s great to learn new, advanced techniques that wow your learners, that’s not what this list is about. This list features simple, built-in features for Articulate Storyline that make life so much easier.
Odds are that if you develop in Storyline regularly, you may already know most of these. However, we encounter developers all the time that don’t know about some of these features. So, just to be sure your bases are covered, we’ve compiled a list of features that you absolutely need to know to be your most productive. The thing is, there were too many to pile into a single list, so we’ll do this in two parts. Check back later this week for the second half of this list.
Docking Panels
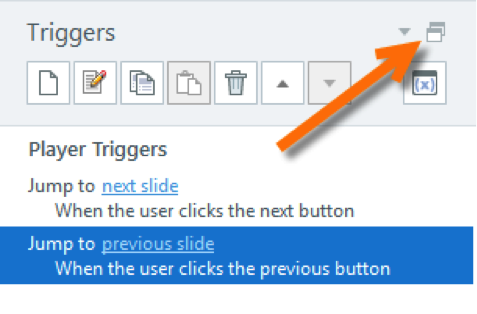
This functionality has been a mainstay in other software arenas (like desktop publishing) for years, but it wasn’t introduced to Articulate users until Storyline 2. This feature lets you undock the various panels around the interface to give yourself more room.
If you’re doing some mad programming in the Trigger panel or are constructing a monstrosity of a slide with 101 objects on the timeline—undock the panel, pull it to a second monitor, and maximize the window. This can give you the elbowroom you need to be MUCH more productive.
Hide Base Layer Objects From Individual Layers
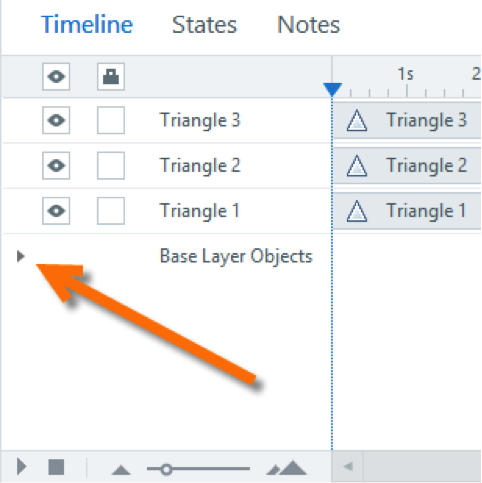
Have you ever been working on a layer and wanted to hide certain objects from the base layer? We’ve seen all kinds of crazy work-arounds from people trying to accomplish this.
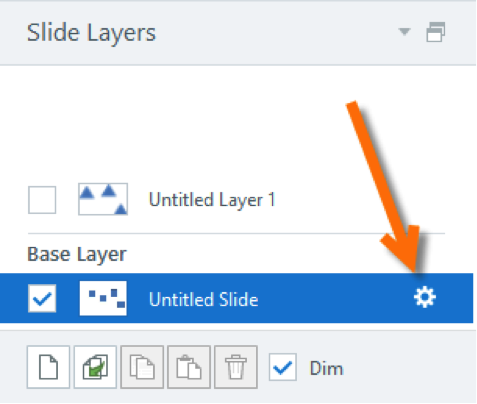
As it turns out, there’s a simple solution. On the layer timeline, underneath the layer’s objects, you can see the words “Base Layer” with a triangle next to it. Click the triangle and it will show all items from the base layer on your timeline. From here, you can individually hide any of the objects.
Button Sets
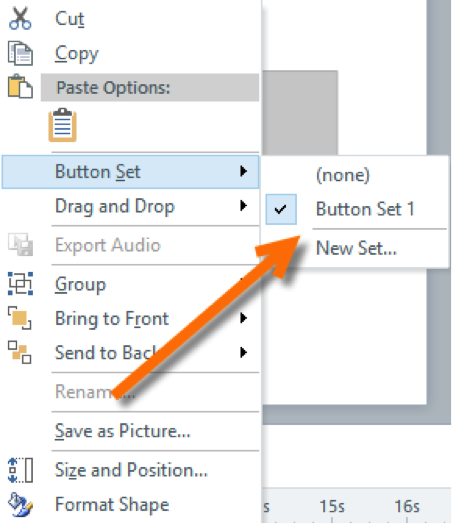
You know the main criteria of radio buttons, right? Their distinguishing factor is that only one can be selected at a time. There are lots of occasions where you could use similar functionality with other buttons, objects, etc. If you have a group of objects and you only want one of them to be “selected” at a time, this is for you. There are convoluted ways to do this with triggers, but using a button set does this for you automatically.
Just select each of the objects you want as part of the group. Then right click and go to Button Set. Either select Button Set 1 or make up a name yourself. That’s it! Storyline automatically gives each object a “Selected” state (which you can further customize) and has made them so only one can be “Selected” at a time. Pretty cool.
Format / Animation Painter
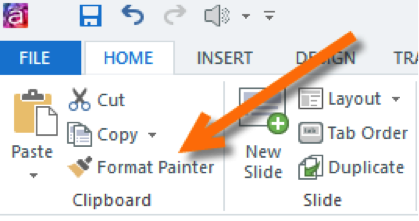
The format painter has been around in MS Office products for forever, but still not everyone knows about it. The Format Painter is used to quickly copy formatting from one object to another. Select the object you like the look of, click Format Painter, and then click the object you want to change to look the same.
The Format Painter picks up all the formatting from your first object, whether it’s a shape, text box, picture effects, etc., and applies it to the second. To copy the formatting to more than one object, double-click instead of single-clicking the Format Painter button.
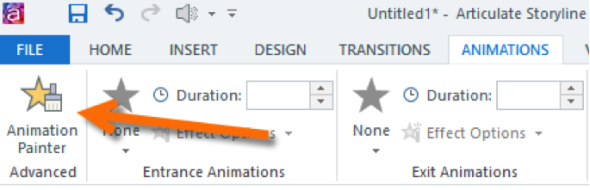
In Storyline 2, Articulate added the animation version of the Format Painter in the form of…you guessed it…the Animation Painter. In the same way the Format Painter copies formatting from one object to another, the Animation Painter copies your animation effects from one object to another.
Customize Player By Slide
Typically you customize the Articulate player on a global level. Do you want Next and Previous buttons? Do you want a menu? Narration text? The seekbar? And so on. However, there are cases where you want to customize the use of some of those items on a slide-by-slide basis.
For example, it can look pretty pointless to have a seekbar progressing on a knowledge check slide that has no audio. By opening the slide properties you can customize these settings individually for the current slide.
Tab Order
The Tab Order functionality was introduced in Storyline 2 as part of their Accessibility features. While this feature is crucial as part of creating an accessible course, there are other times when you want learners to navigate a screen using the keyboard.
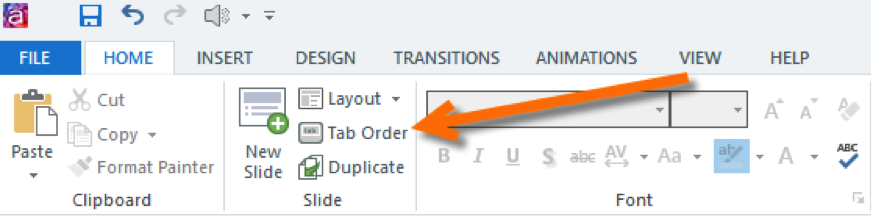
Most commonly this is used with a form, or a series of text entry fields you want the user to complete. In these cases, it is helpful to set the sequence of the fields as the user Tabs through them. Clicking the Tab Order button opens a screen where you can determine which items can be accessed with the Tab key, and in what order they are accessed.
Timeline Triggers
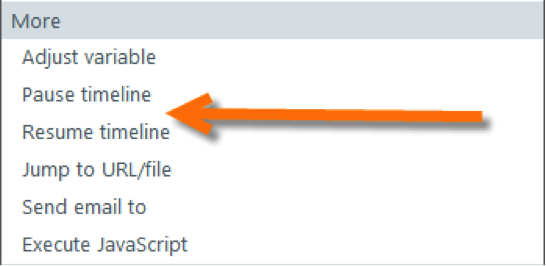
In Storyline 1 there were all kinds of work-arounds to manipulate the timeline. Things like placing objects off-stage with triggers attached to initiate an action at a certain point on the timeline, or creating a “Pause Layer” in order to pause the timeline. Thankfully, Articulate added several timeline-related triggers to make manipulating the timeline much more direct and intuitive. This includes pausing and resuming the timeline, as well as firing a trigger when the timeline reaches a certain point (such as a cue point or a specific number of seconds).
Articulate Storyline Features Make Your Life Easier
That’s it…well, half of it! Nothing truly earth shattering here, but tons of time to be saved using these tips—and time is such a precious resource. If you’re already using all of these features, GREAT! You’re super efficient already. For everyone else, hopefully you’ve picked up a few tips to make your development go a little bit more smoothly.
Check back soon for the other half of our features list in Part 2 of this article.